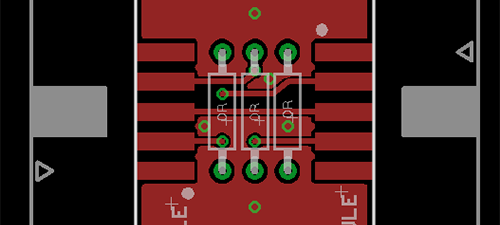
There may be situations where you don’t want to plugin a FAB module directly to another FAB module. Some situations I can think of is If you want to position the additional module somewhere else (trying to fit in a chassis). Or you may want to make a U-turn so the XLR Output Module is facing the same direction as the XLR Input Module. Or maybe, your signal chain is getting too long and you want to break it up so it will be easier to work with.
You can solve all these issues by using an ordinary 10-pin male-to-male IDC cable to hook up the different FAB Modules together.
The normal FAB Module uses Female Headers for the Inputs. So for us to be able to use an ordinary male-to-male flexible IDC cable, we also need Male Headers in front of the FAB Module. Here comes the FAB9001 Cable to FAB Adapter to the rescue.
WARNING: Please do NOT use a Male-to-Female IDC cable to hookup the modules. Otherwise, you will be swapping the V+ and V- terminals, and this could damage your chips. You must use this Cable to FAB Adapter (which also functions as a Crossover, so the correct voltages and signals are routed to the correct pins.)
I have to admit designing this simple board was more difficult than the other boards! The two male headers are orientated 180-degree opposite from each other, and I had to connect both the top and bottom layers! In addition, I have very limited space between the two headers and even after using VIAs, it was still impossible to connect everything. After sleeping over the problem, I came up with an elegant solution… using 0-ohm resistor jumpers (of course, you can also use ordinary wire jumpers but resistor jumpers look better). Also, some of the pins are NC (No Connection) so I really didn’t need to connect them. That saved me from connecting 6 additional header pins. The resulting PCB design is shown above. I used 1/4watt 0R resistors so I’ll have a more “wider” space to tunnel traces underneath.


